
Tutorials
Tutorials, guides and how-tos!
1.0 Managing locations' learning activities
Locations are used in classroom courses, so that you can assign a specific location (a city, a company etc.) and a specific classroom (for example, blue classroom or the name of the classroom).
From the Admin menu, click on Learning ->Locations. The page that appears lists the locations available for educational activities.
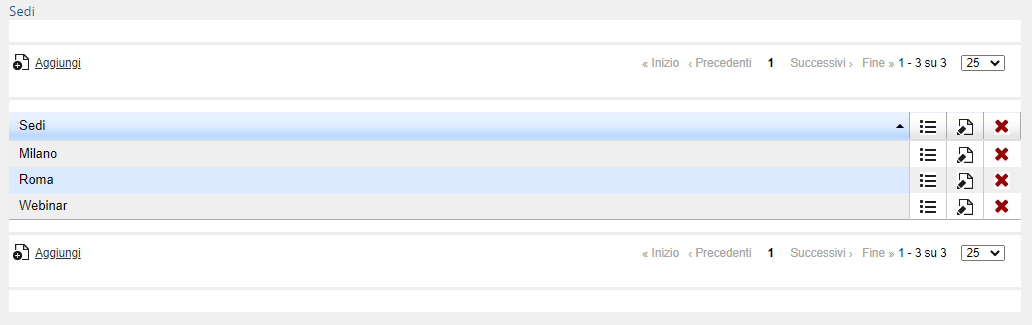
In the table you'll find:
Column Sedi (Locations): name of the location
Column  : if you click on this icon, you'll find the lists of the classrooms associated with the location
Column : if you click on this icon, you'll edit the name of the locations
Column  : if you click on this icon, you'll delete the locations and the classrooms associated to them
1.1 Adding locations and classrooms
Click on the Add link and enter the name of the location. Click on the icon in the line containing the location you just added to enter the page in which you can manage classrooms.
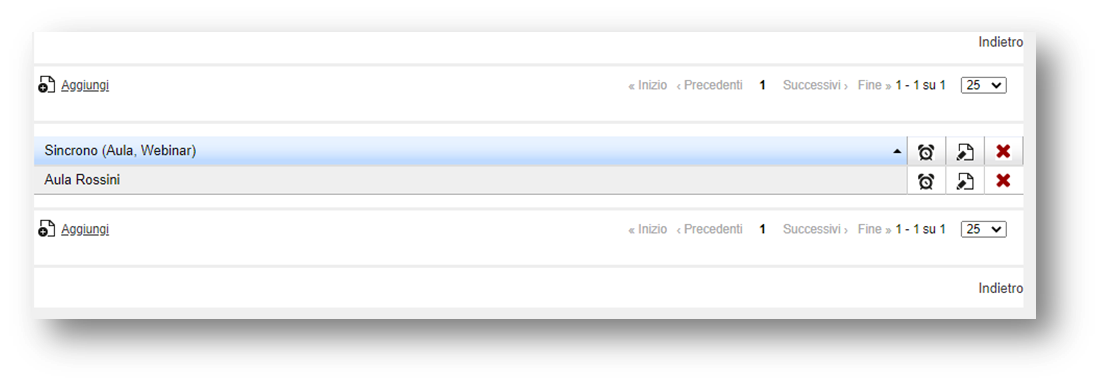
Click on the Add link to add a classroom. In the displayed page enter:
Name of the classroom (it’s the one that appears when assigning the classroom to appointments in the creation of editions for a synchronous course)
Enter all other required information: class, capacity, refers to, street, city, state, zip code, telephone number, fax, layout, classroom equipment, available equipment, notepad.
None of the above values are mandatory.
Click Save changes
1.2 Managing the classrooms of one location
Column: The corresponding classroom is deleted from the location
Column : it’s possible to edit the information regarding the classroom
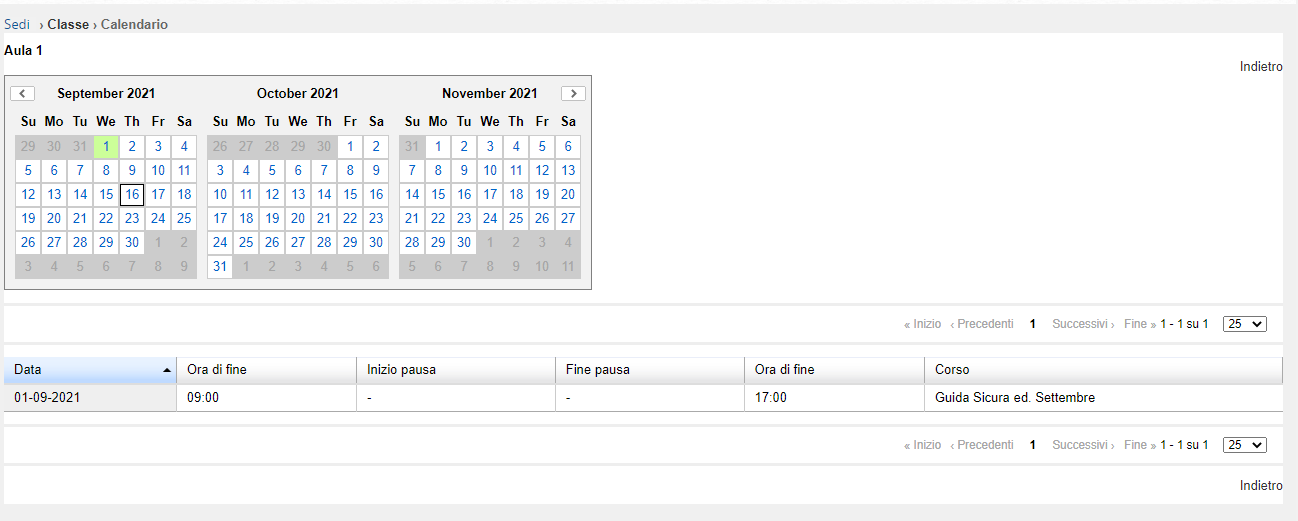
Column : you access a page where you can view a schedule of the current classroom
Column Sede: Name of the location
Coursepaths is used when a user is supposed to participate in a set of courses on which prerequisites have been set. It might be, for example, a set of 3 courses that have to be taken in succession.
1.0 Create the new coursepath
Go to E-learning, Courses and Coursepaths.
Click on “Add” and insert the name and code of the new coursepath.
Choose if the registration is free or if it depends on the admin.
Save.

2.0 Insert courses in the coursepath
Click on the second icon (second column) on the right and enter the courses that are part of the new coursepath. Select the courses from the list.

2.1 Set or change course order
Once you’ve entered the courses, use the arrows to establish the order in which you want users to take them.
2.2 Set course prerequisites
For each course, click on the padlock to indicate which other course the participant must have completed before proceeding with this one.

3.0 Register users
Going back on the coursepath main page, click on the first icon (first column) to register the users you want. Before you do this, make sure each user is also registered to each single course.
When entering their profiles, users will be able to access just the first course of the coursepath, while the others are locked.

4.0 How to use coursepaths
You have 2 different options:
- Enable the "Coursepaths" TAB, and let your users access them from there
- Do not enable it, and let your users access the courses in the desired order, provided you have set a sequencing, from the "My Courses" page. To be able to do this, you have to set
from Settings>System Config>Settings>Elearning tab.
General question settings
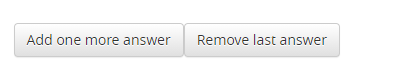
Every question type, when you add it, has 2 possibile options (answers) by default. Excepted the types where this doesn't make sense.
You always have the buttons: Add one more answer or Remove last answer that you can use to add or remove options.
You can also add positive scores to the correct answers, negative scores to the incorrect ones, and comment both answers. Your comment will be displayed to the user in the Scorecard.
Question type: Single choice (SC)
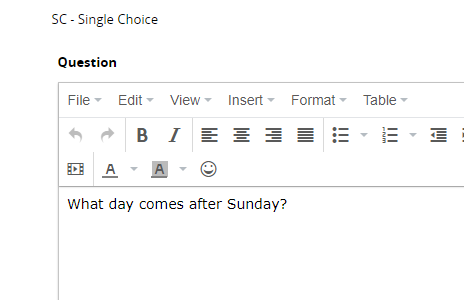
This is the most common question type. In other LMS or in real life this is often called Multiple Choice, but it's actually a single choice, since only one option is the right answer. This is how you insert your question text
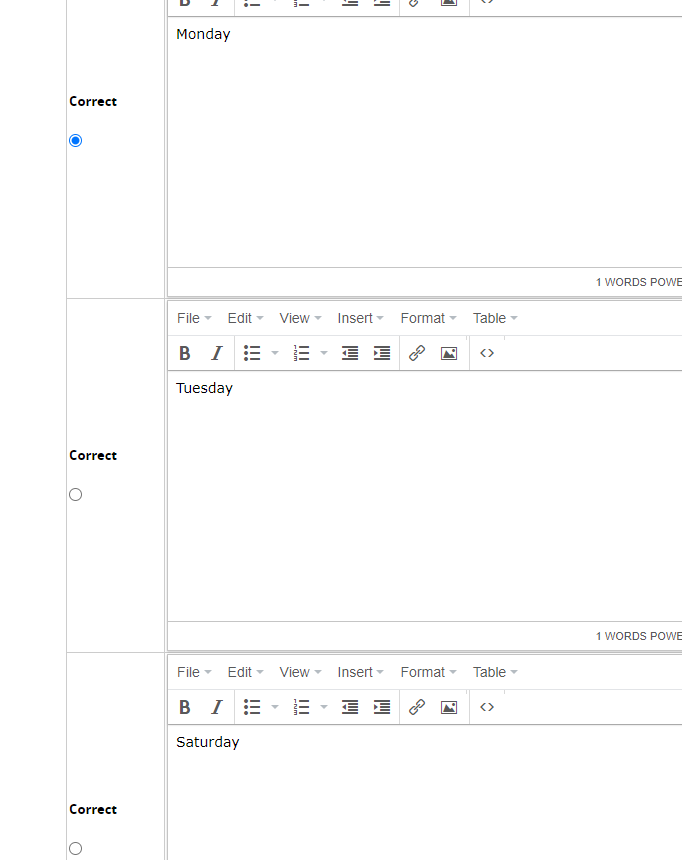
This is how you insert answers. Please note that you should mark the radio button in the correct one.
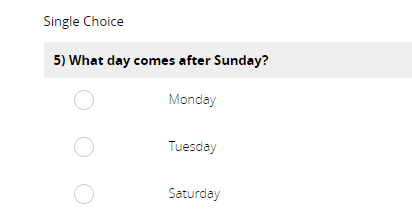
This is how the output looks
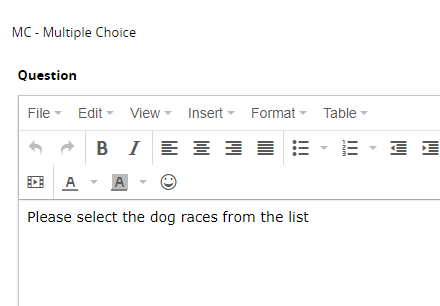
Question type: Multiple Choice (MC)
The Multiple Choice question has ... multiple possible correct answers.
This is an example of a MC question
This is how you insert the possible answers: remember to flag as correct the appropriate answers
And this is how it the output will look like

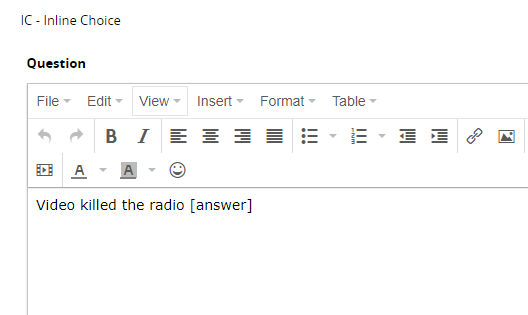
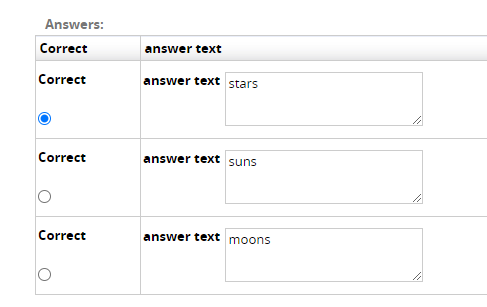
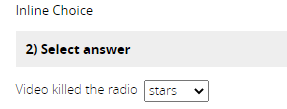
Question type: Inline Choice (IC)
This is how the question text should look like: the [answer] placeholder automatically appears in the editor, please leave it as it is. It's where the learner will see a dropdown menu.
This is how you insert the answers.
And this is how the output will look like
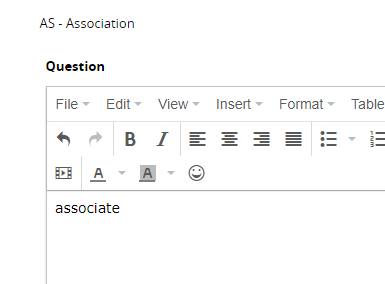
Question type: Association (AS)
In this case, the user is supposed to associate items on the left side to items on the right side, that will be chosen from a drop down field.
Let's see this example:
These are the answers, with items in group A and B
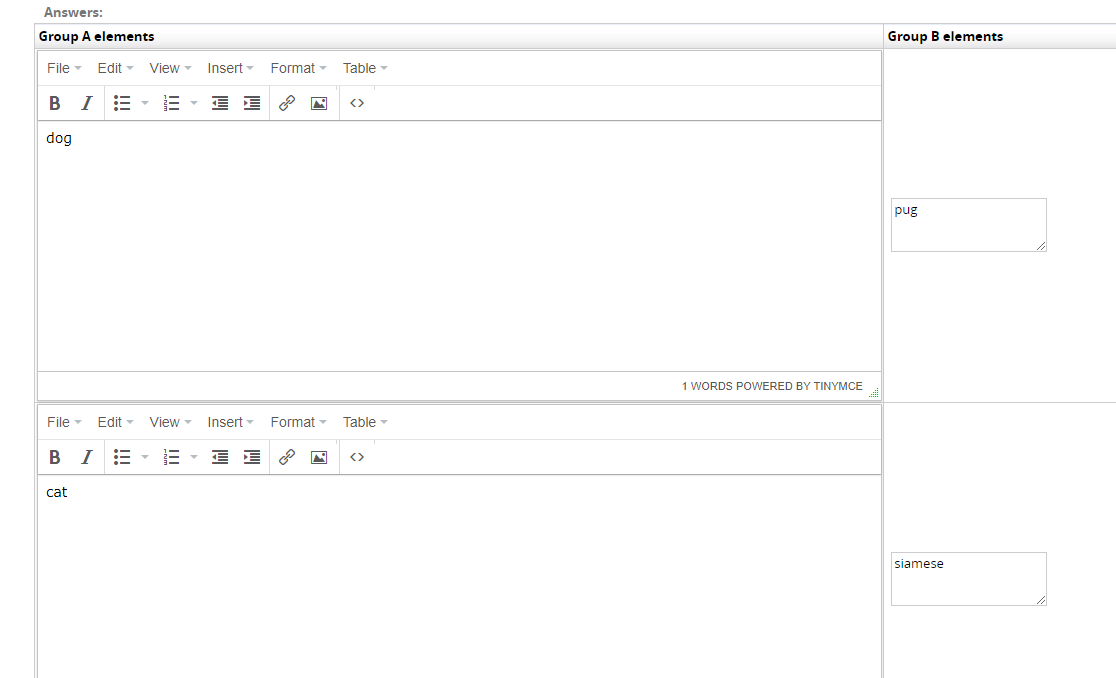
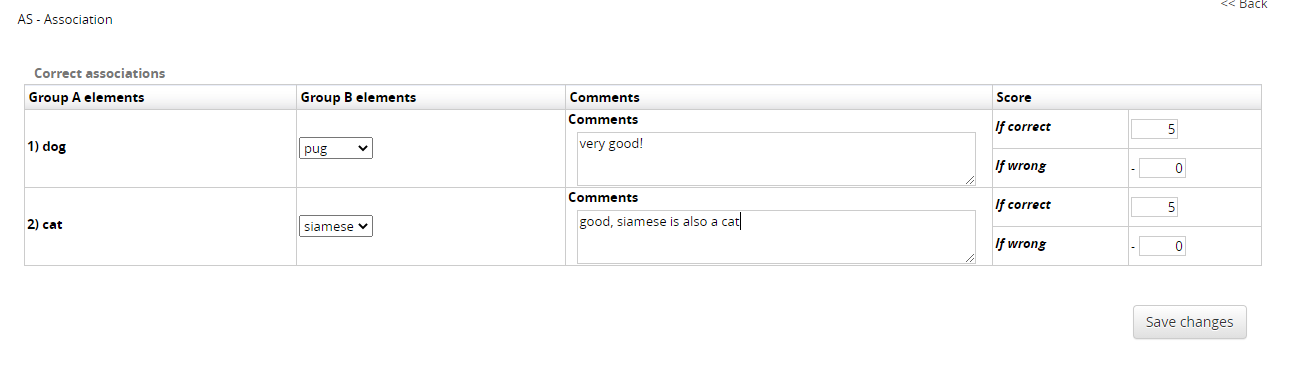
Then you just have to associate A and B (and comment, if you wish).
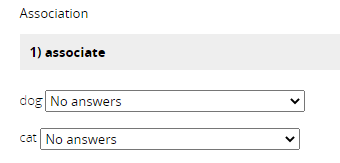
This is how it will look like
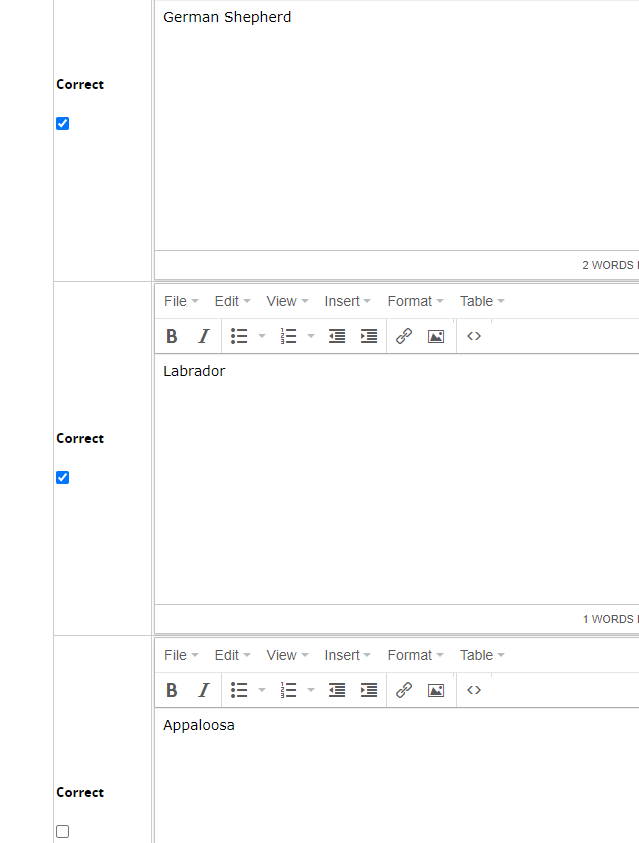
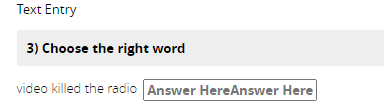
Question type: Text Entry (TE)
This question is what is commonly called "Fill the blank" in other systems, and that is exactly what it is.
The [answer] placeholder is where the learner will be displayed an empty box where he is supposed to fill the blank with an answer.
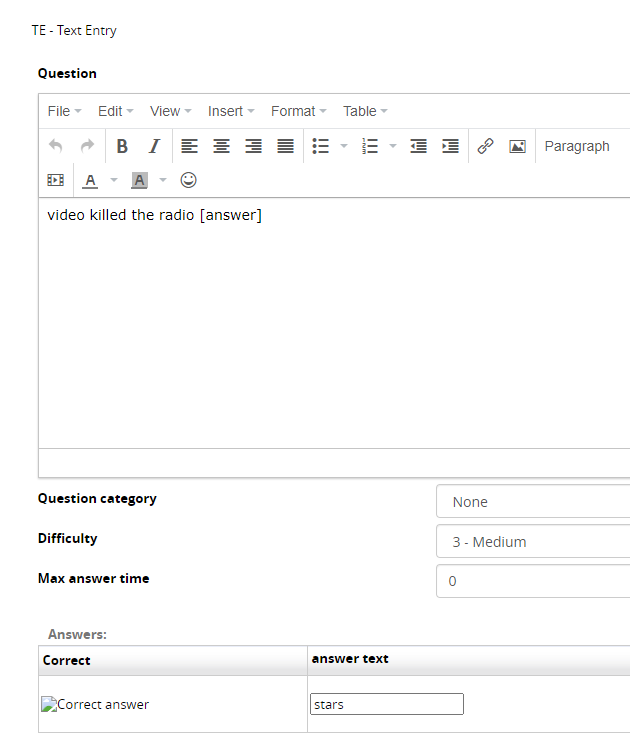
In this case, of course, there is only one possible answer.
This is how the output looks like.
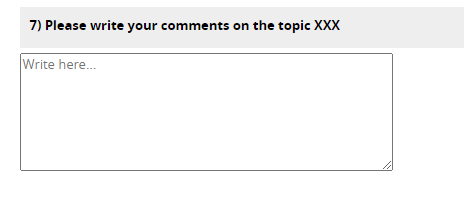
Question type: Extended Text (ET)
This question type is used when you want your learners to write an open answer, a short essay or a comment. In this case, the system of course will not be able to automatically assign a score, but the teacher's intervention will be needed.
This is how you insert the question

This is how it looks like when published.
The teacher will be able to see the comments in the gradebook or user stats.
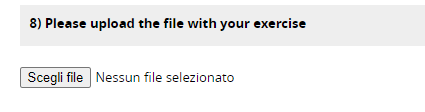
Question type: Upload File (UP)
Use this question type when you want your learners to upload a file, for example an excel file where they have taken the exercises you told them to.
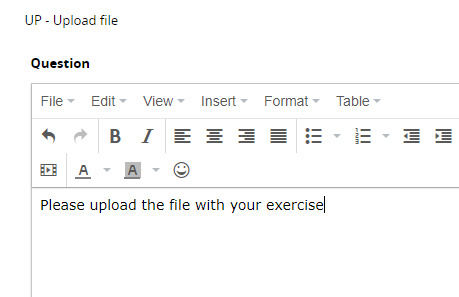
This is how it looks like (the "browse" button wording depends on your browser settings.
The teacher will be able to download the file from the gradebook or from the user stats.
Say you have created multiple templates, and linked them to different URL's or different org chart nodes. You probably have already used this tutorial on how to customize your template or templates.
How do you manage them? What happens to the user journey?
Let's explore the different settings.
URL's and DNS
You have to create the dedicated URL' first. You don't do that in the LMS, of course, you do that on the control panel of your website domain.
And of course you have to make the URL's point to your installation of Forma.
The basics: associate template and node
- Create different templates for your customers >> you do that by duplicating and renaming the templates folder. Then you can replace company_logo.png, bg.jpg, favicon.ico and favicon.png in the duplicated template. Please refer to this tutorial https://docs.formalms.org/tutorial/192-how-to-customize-logo-and-cover-image.html or... to our Templedit plugin, you can find it here https://www.formalms.org/forma-plugins/item/4-templedit.html
- Assign the different templates to different nodes >> click on the "edit" icon for every node. That way, if a user is in a node, he will see the assigned template after the login
Implications: be careful if you have users associated to multiple nodes; it's enough if you have an SSO login; no complication with the DNS management
User journey: the login page is the same for everybody, after the login you are displayed the template associated to your node, regardless of the template you have been displayed at the beninning. When you log out, you are taken back to the original URL and to the default template.
More advanced: associate template and domain
- If you also want your users to be displayed different login pages, you first need to create the different URL's >> you do that with your DNS panel, not inside Forma. Then make your different URL's point to your platform's IP address or DNS. You normally do that with a A record.
- Go to https://docs.formalms.org/reference-guide/configuration/system-configuration.html >> point 5 and associate the different URL's to the different templates. >> that way every address will be associated with a different template even in the login page.

The url has to be written without https and www in the first field. The other 2 fields are dropdown menus where you can select the right template and the right node.
Implications: you need to be able to manage your DNS or your customer's DNS. While it's something that takes 1 minute to do, you might not have a collaborative IT on your or your customer's side, or you might be on a low-budget hosting solution that doesn't allow you to manage your DNS settings. Depending on how your infrastructure works, you might have to configure virtual hosts on your server.
User journey: you should communicate different URL's to your customers, to each one their own. They will be displayed a different templat at login and after logging in. When they log out, they will be displayed their custom URL and custom template.
General Settings you should think of
We recommend using a general-purpose e-mail sender, because the system will use it all across the board.
You can also enable different areas (catalog yes or no, career and certificate yes or no, held desk button yes or no) to different org-chart nodes. That is independent from the template, but it's another possibility to customize the User Experience for different populations.
When you create the course categories, use topics and not clients' names, to avoid the risk of a customer seeing other customer's names.
You can also use the advanced registration form, if your user self-register. That way you can make them be assigned a specific folder (where you already have applied a template, or enrollment policies etc. etc. ).
Use a customer-oriented organization chart.
Use customer-specific catalogs.
Use customer-specific additional fields, if needed.
Create specific admin profile, and assign your customer well designed permissions (concerning user and course management).
Be aware that the automatic notifications (lost password, course subscription... ) sent by the LMS, if they include the [url] tag, will have the default URL.
If you want to take care of that, please replace the [url] tag in your language management with the [dynamic_link] tag.
This will replace the default URL with the one associated to that template.
